Hello everyone! Today’s tip is for a simple skirt, where I’ll explain a step-by-step basic skirt pattern that will be used for both the front and back in the same outline.


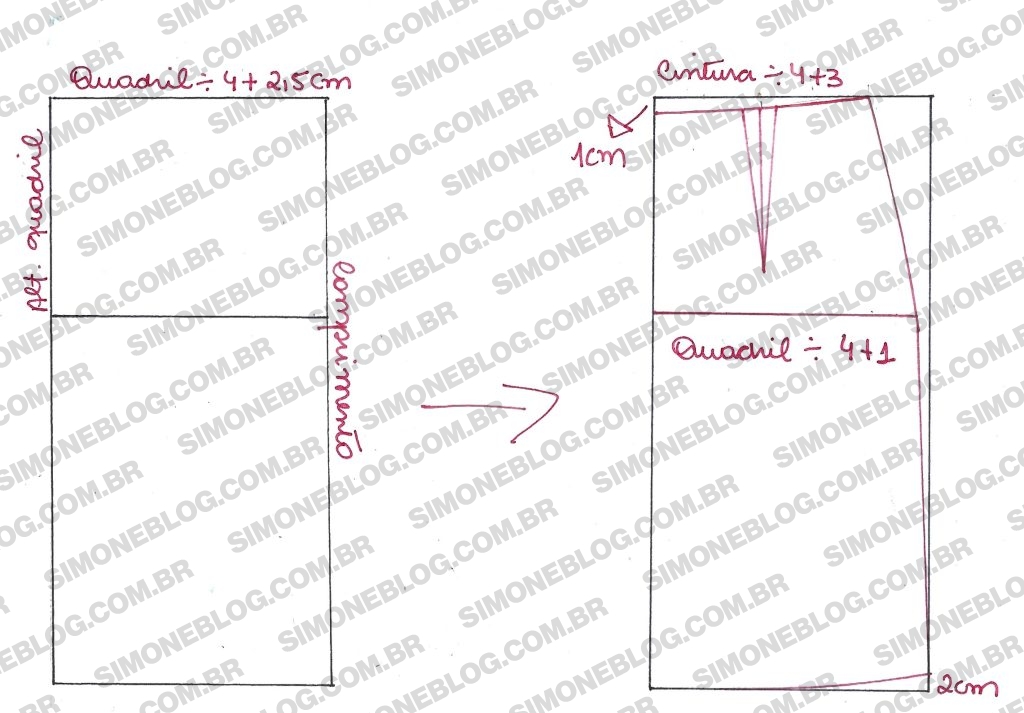
To create the skirt base, I drew a rectangle with the width of the hip measurement divided by 4 plus 2.5 cm. For the length, I used 60 cm, but this is optional. Then, I marked the hip height. I marked the waist measurement divided by 4 plus 3 cm for the dart and lowered it by 1 cm. On the hip height line, I marked the hip measurement divided by 4 plus 1 cm, and the dart height was 15 cm. Remember, this base is the same for both the front and back.
To create the design, I eliminated the dart at the side seam.
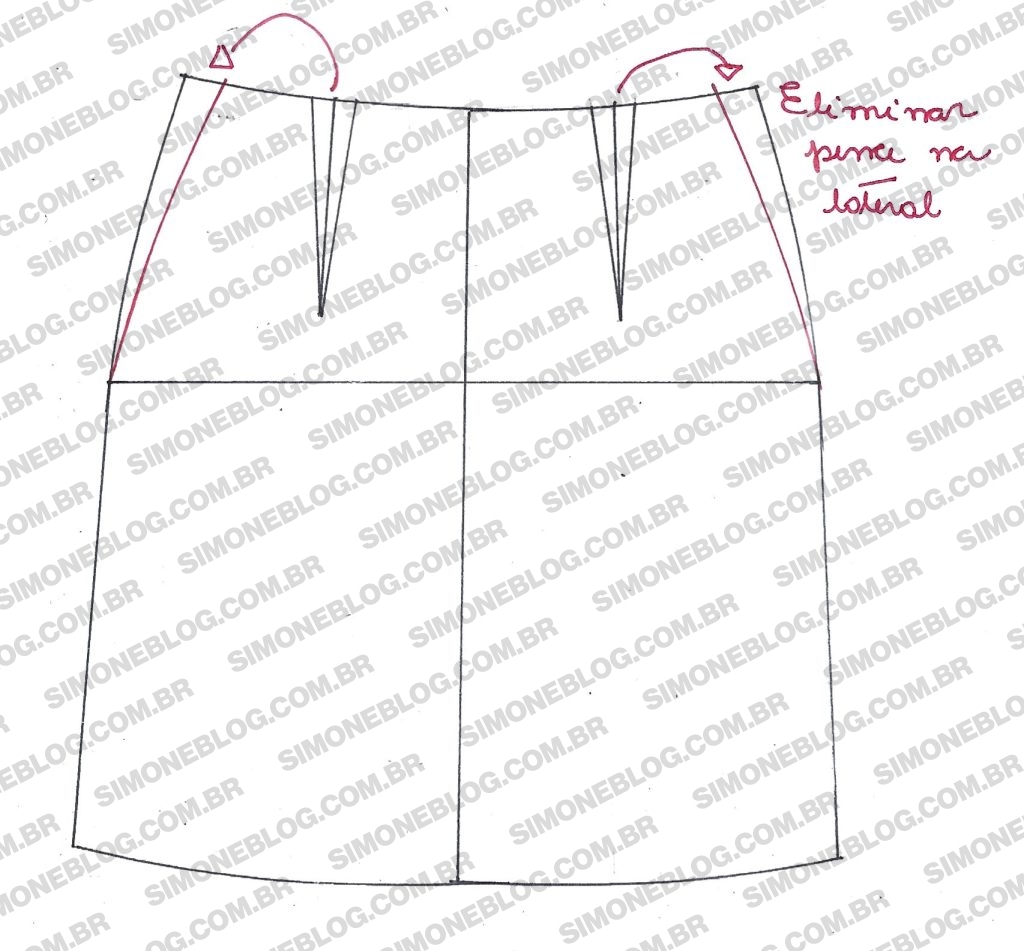
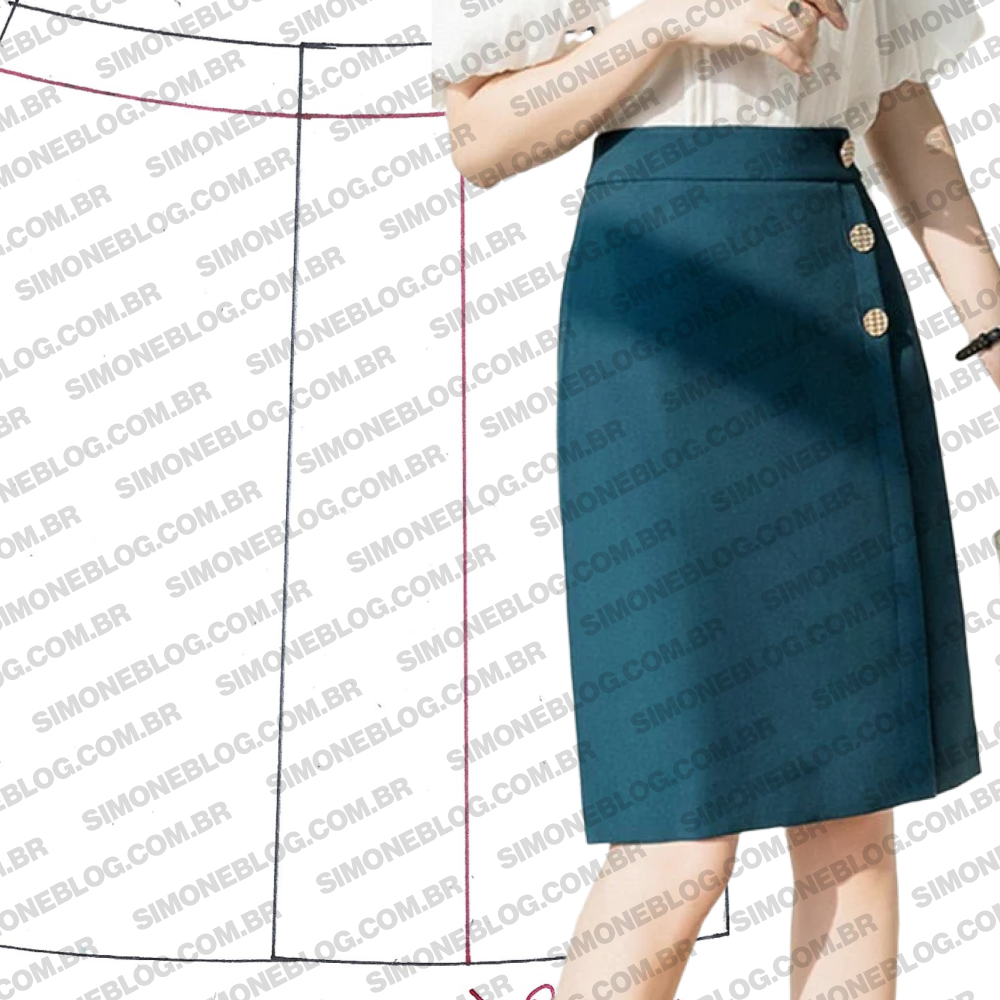
With the dart removed, I marked the waistband height at 40 cm, and on the right side, I marked the center of the waist and connected it to the hem.
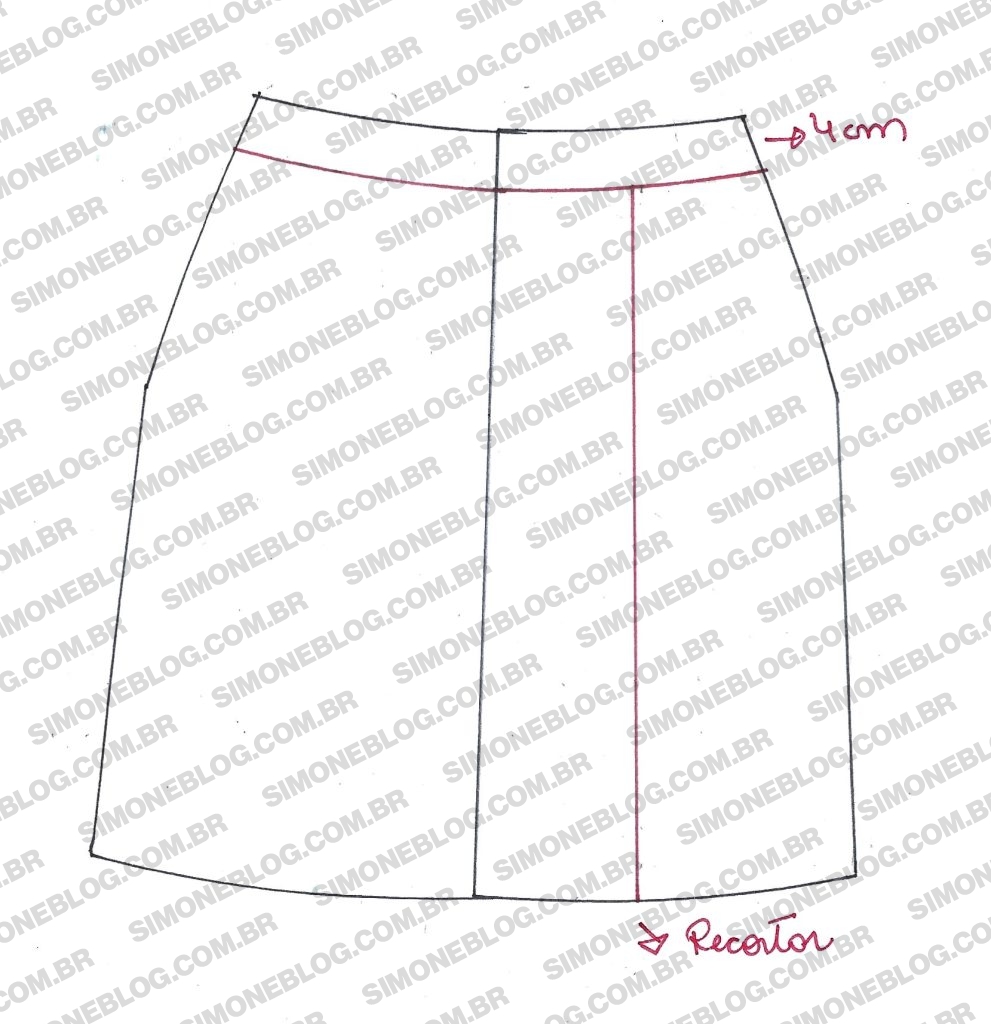
I separated the waistband part and increased it by 6 cm. The red line will be the inside fold, forming a pleat.
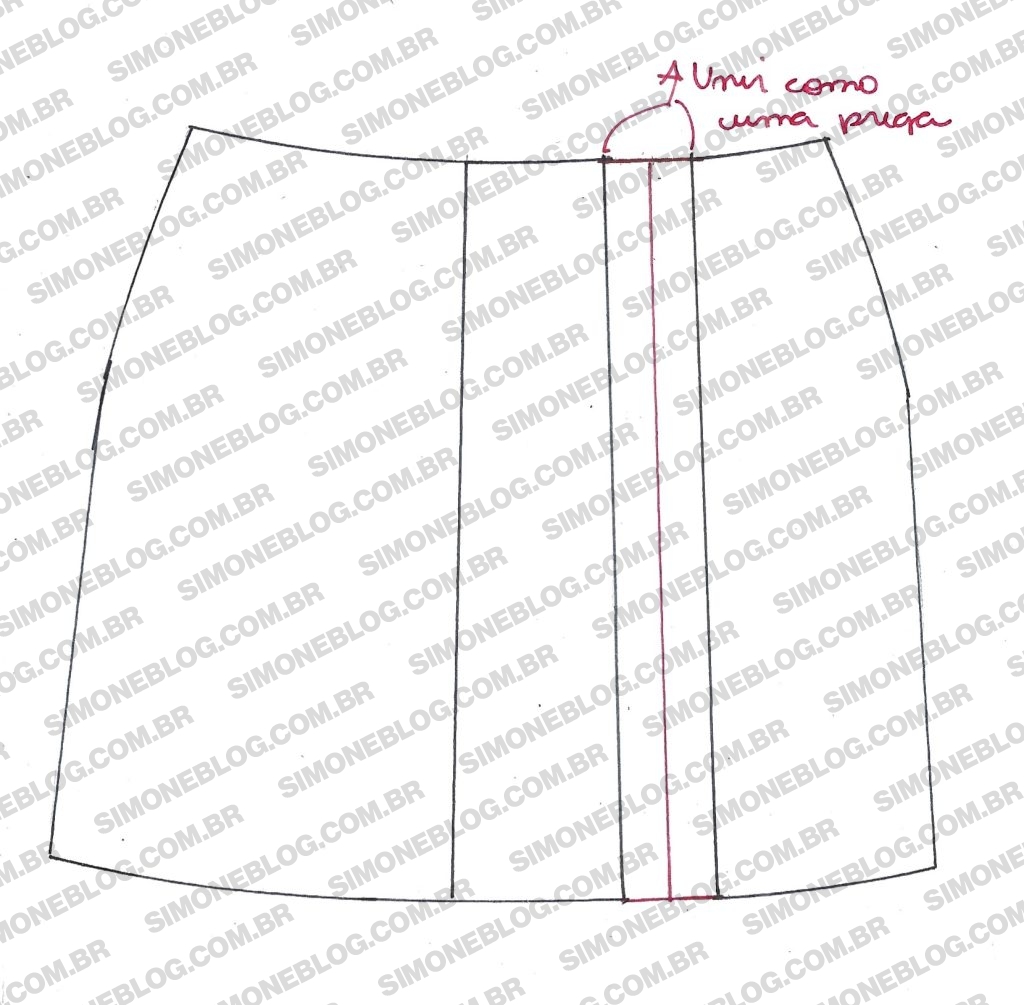
On the back pattern, I marked the waistband height at 4 cm.
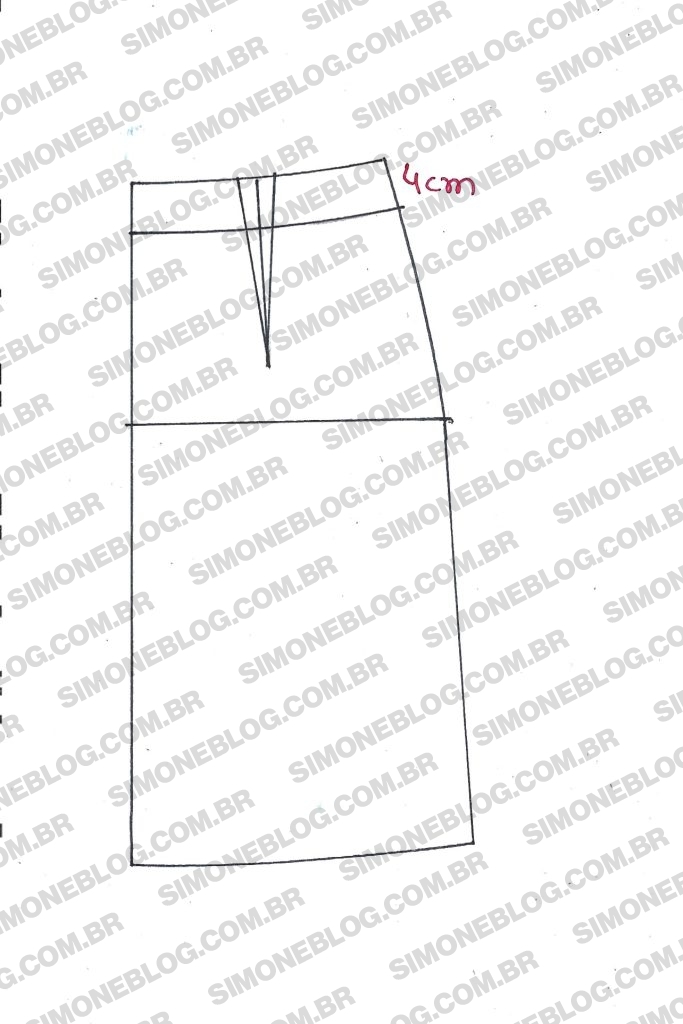
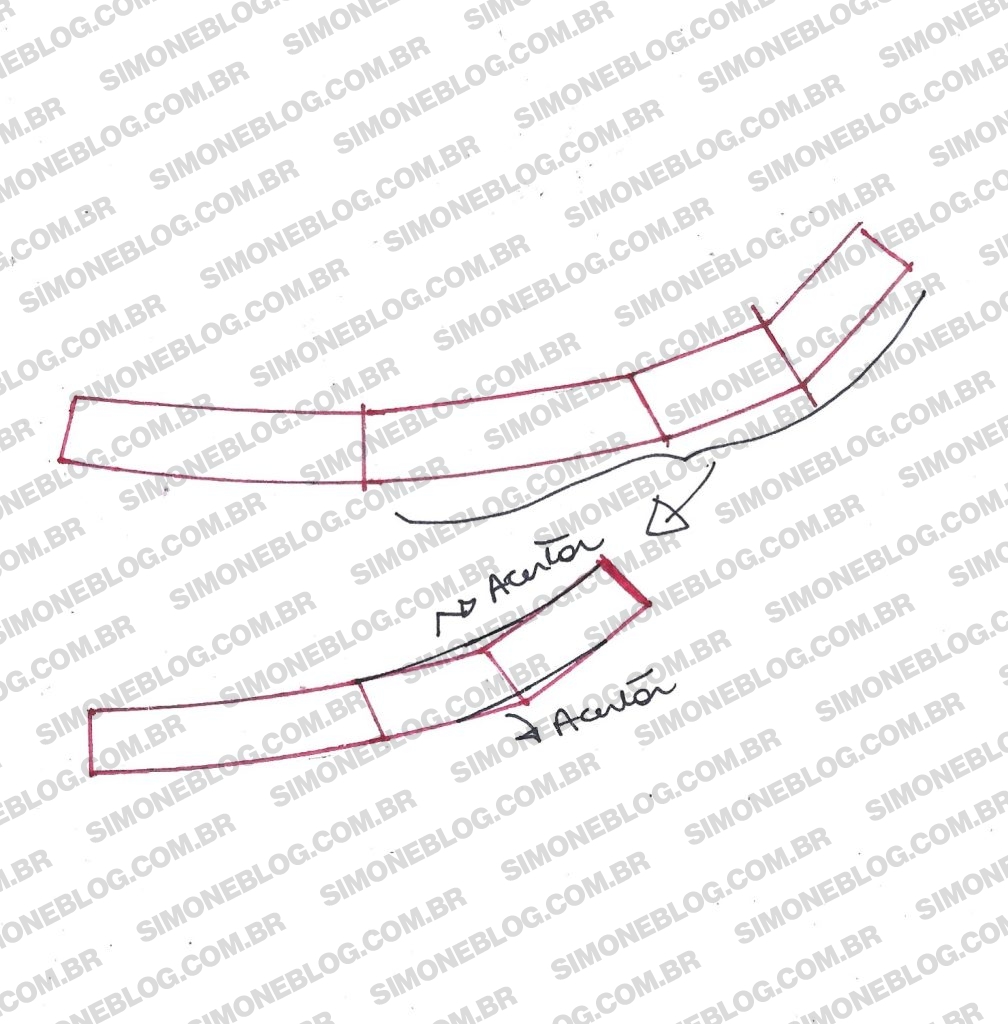
I connected the side seams of the waistband. Since the front waistband was half of the pattern, I removed half and adjusted it, resulting in 1/4 for the front and 1/4 for the back, forming half of the total waistband.
I hope the tip helped and see you in the next post.





Deixe um comentário