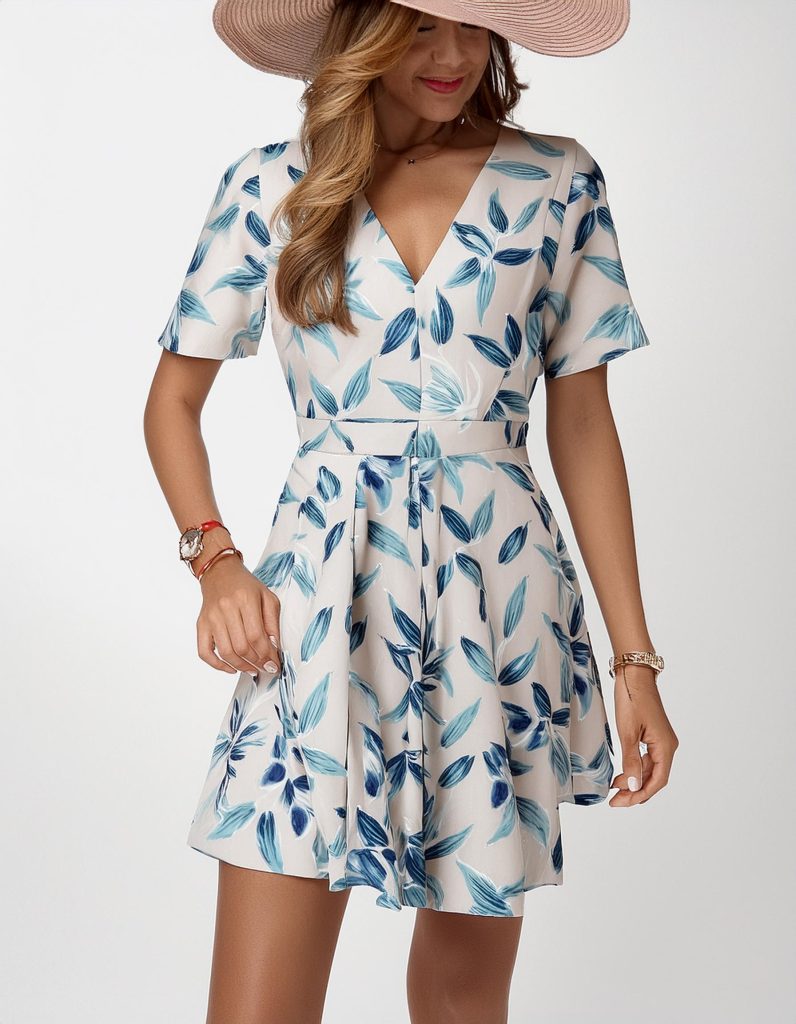
Hello everyone, how are you? Today’s tip is for a simple and beautiful dress with short sleeves.

To make the front pattern, I lowered the neckline by 11 cm and reduced the shoulder width by 3 cm. I added 1.5 cm to the side (armhole, waist, and hips). I adjusted the neckline by 2 cm and extended the hemline by 5 cm, connecting it to the hip and raising it by 1 cm to even out the hem. I left the waist dart as ease.
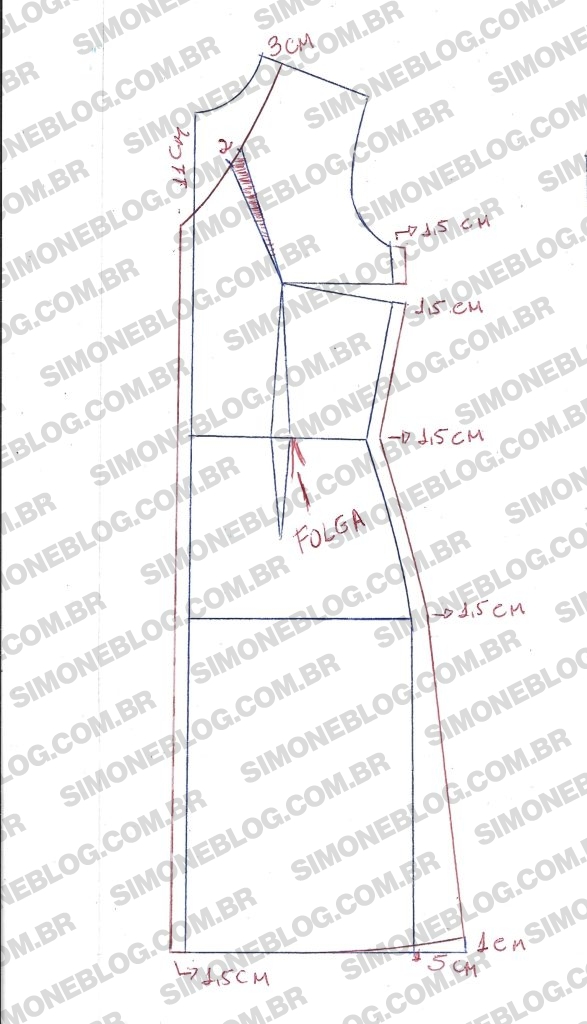
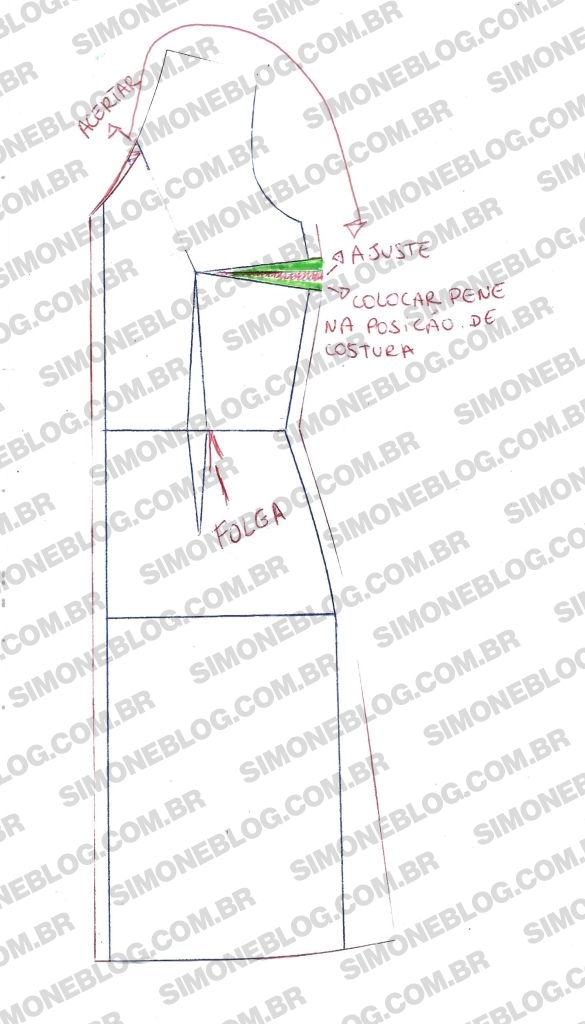
I transferred the adjustment to the bust dart, corrected the neckline, and moved the dart from the overlap position to the sewing position.
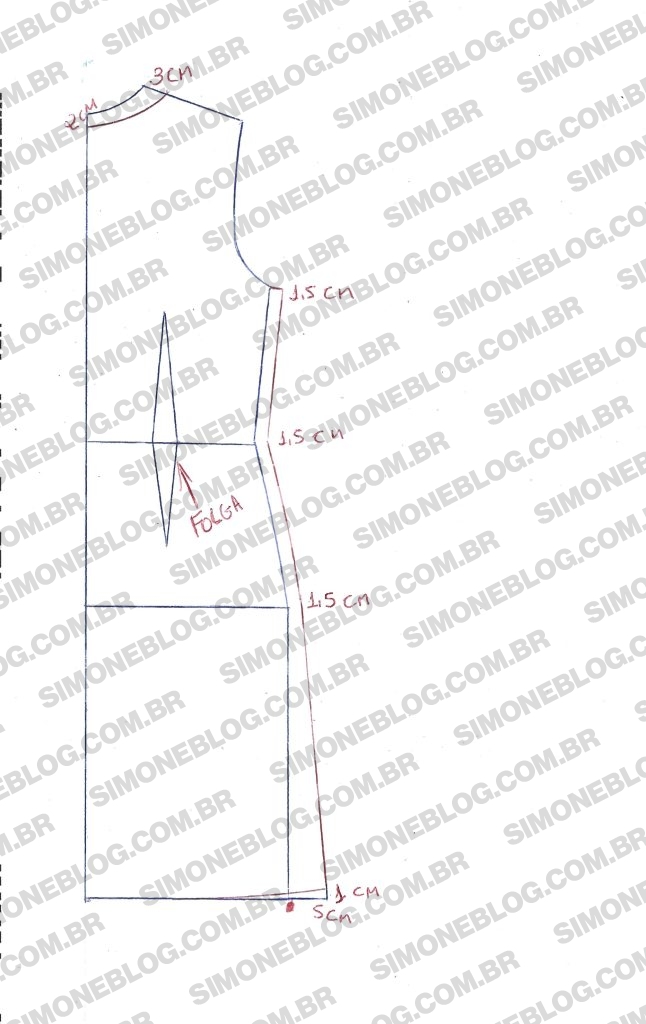
or the back pattern, I reduced the shoulder by 3 cm and lowered the neckline by 2 cm. I added the same 1.5 cm ease as on the front (armhole, waist, and hips), extended the hemline by 5 cm, connected it to the hip, and raised it by 1 cm to adjust the hemline. I left the waist dart as ease.
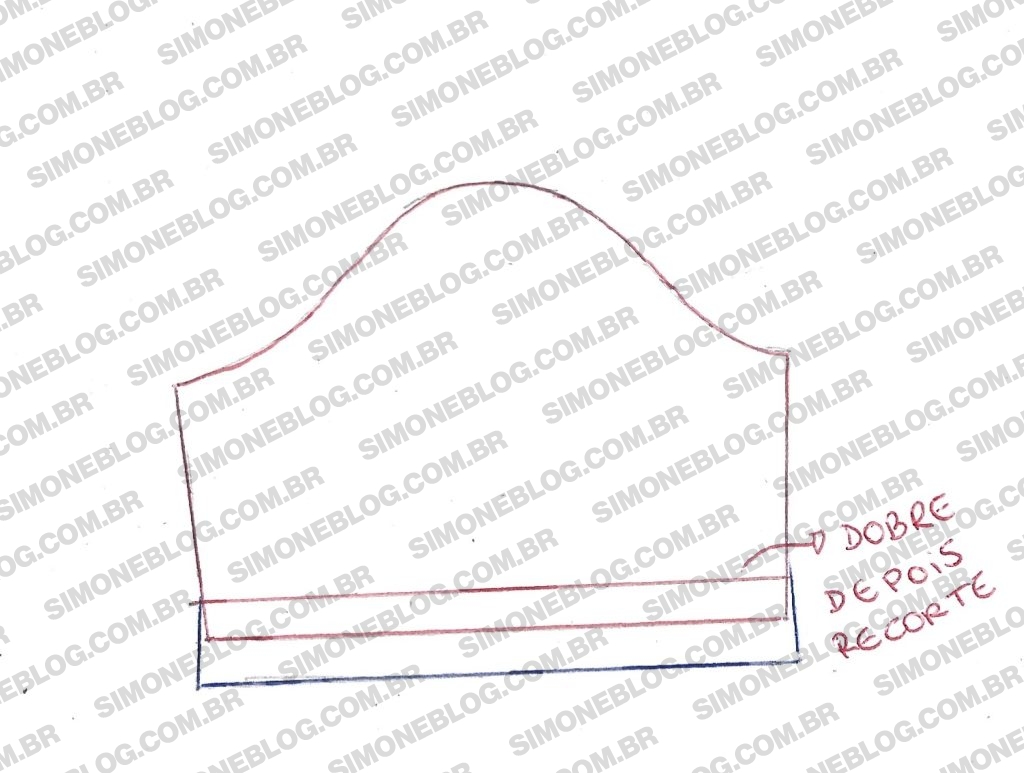
The sleeve was set to a length of 27 cm, including a 2 cm hem allowance. I added the same 1.5 cm ease to the armhole and 2 cm for arm ease.
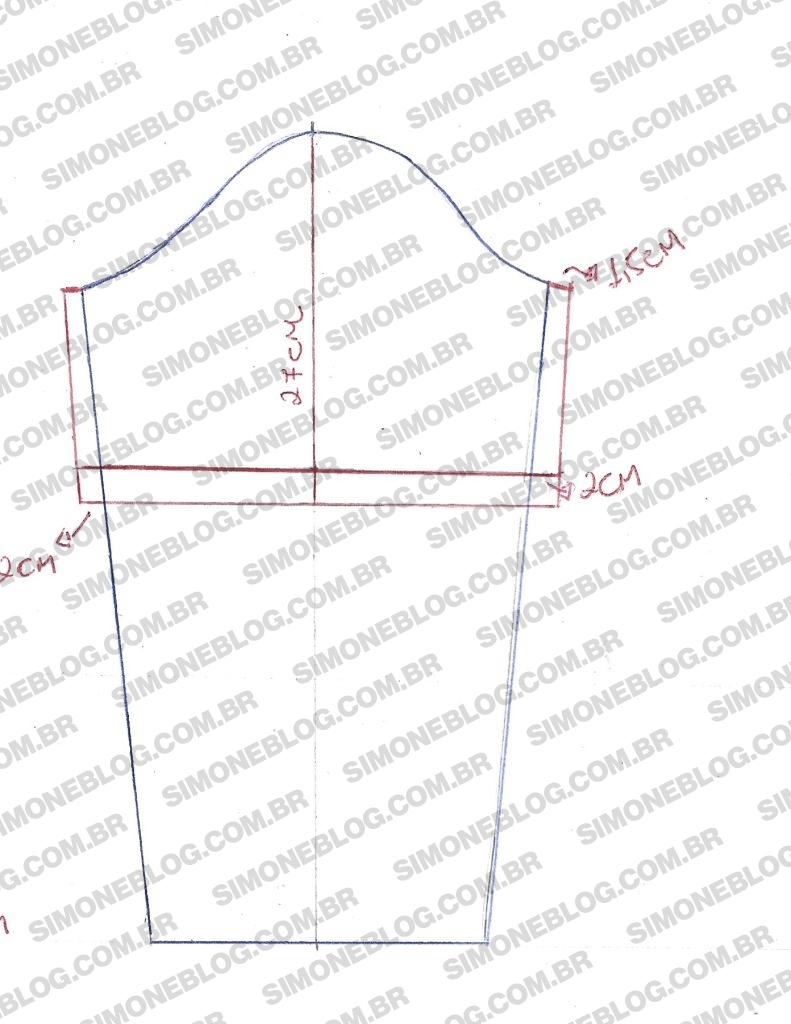
Before cutting the sleeve, leave extra paper, fold it at the 2 cm hemline, and then cut. Remember to fold it twice for accuracy.
For the belt, the height was set to 4 cm by 1.50 m in length.
MORE IMAGES FOR INSPIRATION AND CREATION OF SIMILAR DESIGNS



I hope this tip was helpful, and see you in the next post!


Amei bem explicado mim tirou muitas dúvidas tá de parabéns ☺️